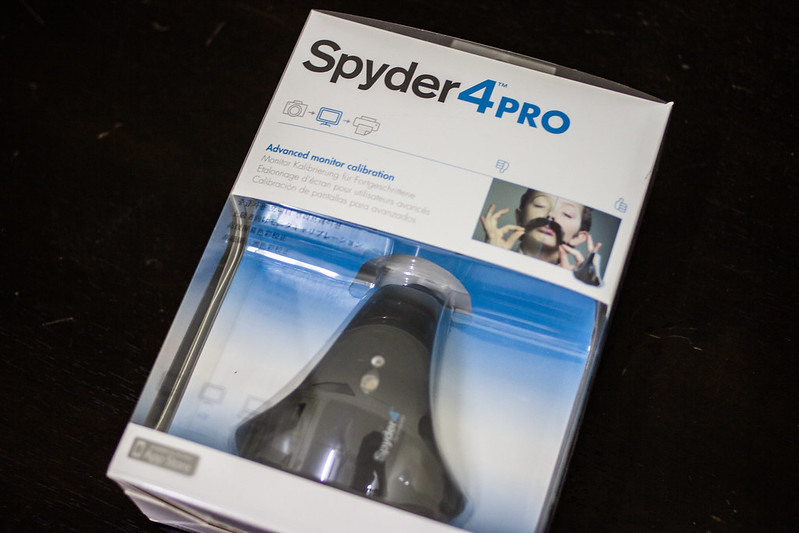
Finally, it is here. A proper colour calibration tool!
Colour calibration tool you ask? Yes, it's a hardware+software based tool to calibrate your displays to achieve more consistent and accurate colours, tones, dynamic range,etc. Basically, whatever your monitor displays.
So here's the thing, there are various types of displays in the world that would exhibit different colour characteristics, for example an AMOLED display is known to feature rich, vibrant and saturated colours whereas something like a IPS panel might be more towards more accurate and natural colours. Even within the same type of panel, manufacturers can also tune the colours of the display to their liking. In short, there is a huge inconsistency in colours displayed in most monitors in the entire world. What I see in my monitor might be very different from what my friend sees on his laptop. Thus, in order to be confident and be very sure that what you're working with is the accurate and right one, you have to use a colour calibration tool. It won't be 100% accurate but it will be a very good base to start with. Bear in mind that the end result also depends on the capability of your monitor such as type of panel, base colour gamut, etc.
http://spyder.datacolor.com/portfolio-view/spyder4pro/
Now I can edit my pictures with confidence knowing that my monitor is
displaying a lot more accurate colours! I'm using a Dell U2311H IPS
monitor which is a great monitor btw (IPS monitors are always great :P )
Initially the colours seemed a little reddish (maybe like a slight red cast) but this is because my eyes were too used to the inaccurate colours before calibration. Right now, after using it for 1 whole day already, I could say I'm already fully adapted to it. Colours look brilliant now!
Not only that, black levels and white point have improved tremendously. I can notice deeper blacks and sometimes notice unwanted stuff in the shadow areas like some gradient banding in some people's pictures. Totally didn't notice these sort of things before :P
I totally passed this test :P http://www.lagom.nl/lcd-test/black.php
How much did I pay for this? A big RM660 for this awesome thing. I got this from camera2u.com
http://www.camera2u.com/Accessories/Datacolor-Spyder4PRO-Colorimeter.html?keyword=spyder4+pro
By the way, Spyder's
official website also did mention that "Prints often do not match
display. Display calibration provides a base for better print matching. I am definitely planning to do some printing now knowing that I have a colour accurate monitor and that the prints shouldn't be that off...even if it does, it should provide less headaches than before haha
Datacolour offers several types of Spyder calibration tools, namely the Express, Pro and Elite. Spyder4 Express is a lot more affordable at around RM400+ only whereas the Pro version goes for RM600+ but the reasons why I opted for the Pro version is due to 2 things:
1) Ambient light sensor - Detects the ambient light and then recommends you the level of brightness you should be using
2) Able to be used on multiple computers - With this, you can install on different computers using the same given license code.
I definitely thought ambient light sensor function in the Pro version was definitely indispensable. During the set up process, it detects that my room has a brightness level of 200nits. Thus, it suggests that I set my monitor brightness level to the same value. But the thing is that 200nits is very bright, so bright that it is very straining for my eyes and totally uncomfortable. I asked some of my friends for advice and most of them recommended me to set the brightness level to whichever I'm comfortable at. I found myself setting the levels at 100nits instead haha
And the capability of the Pro version being able to use it on different computers makes it great especially if you have several devices that needs colour calibration. I don't have a laptop for now as I've just sold my old one, but might have a one in the near future.
Well, in conclusion, this is a really good buy for anybody who is taking
photography seriously, be it enthusiasts or professionals. But honestly,
for professionals who make an income from photography, there's no
excuse for not having one of this. Definitely a great buy for me, thoroughly recommended =)
Sunday, January 13, 2013
Thursday, January 3, 2013
Brand New Year
Happy New Year 2013 to all my blog readers =)
This time round, I'm determined to try taking pictures of fireworks celebrations. Didn't quite bother doing so for the previous years partly because I wasn't well equipped. Didn't have a tripod. Also, wasn't really into landscapes/nightscapes and all, but I was still amazed at all those shots you see online.
Met up a few friends (who are lowyat forumers) to shoot the fireworks display together. We decided that it was best to shoot at less popular places as it will be really packed with people (KLCC). Not to mention the enourmous jam you have to endure on your way back home. You might also run into some party goers, some of them equipped with spray cans!
So, it was decided to be at 1Utama, just a stone's throw away from the Curve. The fireworks would be fired just above The Curve building according to past events. We were at the 1Utama car park, 5th level, a great spot, to capture the entire scene.
This time round, I'm determined to try taking pictures of fireworks celebrations. Didn't quite bother doing so for the previous years partly because I wasn't well equipped. Didn't have a tripod. Also, wasn't really into landscapes/nightscapes and all, but I was still amazed at all those shots you see online.
Met up a few friends (who are lowyat forumers) to shoot the fireworks display together. We decided that it was best to shoot at less popular places as it will be really packed with people (KLCC). Not to mention the enourmous jam you have to endure on your way back home. You might also run into some party goers, some of them equipped with spray cans!
So, it was decided to be at 1Utama, just a stone's throw away from the Curve. The fireworks would be fired just above The Curve building according to past events. We were at the 1Utama car park, 5th level, a great spot, to capture the entire scene.
From left: Myself, Legend, Melvin and Kien Seng. Small group, partly because it was a last minute meet up.
As this would be my first time shooting fireworks, I wasn't really familiar with the timing. I knew that your camera had to be set to bulb mode, Aperture around f/8 to f/11 (just make sure that your overall exposure for the entire image has to be more than 4-5 seconds), ISO set to ISO100. Use remote trigger, for the record, I'm using an Aperture Flash trigger that comes with a wireless remote as well.
Thanks to the guys for giving me some tips regarding the shoot. What I know is, you have to keep on firing your shots with about 1-2 seconds interval from the next shot. If you want to see the trajectory of the firework firing up to the air, make sure you open the shutter when you see it shooting up. When to close the shutter? When it explodes and starts to subside, immediately close the shutter. You can have varying effects while playing with shutter speed. I myself used a 1-2 seconds Shutter Speed for each firework. I did have a tendency of prolonging the shutter open because there were continous fireworks exploding at the same time, but the result wasn't really pleasing. It was mostly overexposed and the formation of fireworks wasn't nice. It was mostly blurry. What you want to achieve is tact sharp fireworks.
Labels:
1Utama,
fireworks,
Happy New Year 2013,
Landscape,
New Year 2013,
nightscape,
The Curve
Thursday, December 27, 2012
Short trip to Singapore
Had some time over the weekends, so my family and I went over to Singapore for a short visit. We flew straight from LCCT to Changi airport as the air tickets weren't too expensive.
The last time I visited Singapore was actually just over 3-4 weeks ago, having to attend my brother's ROM over there. Never expected to go back so quickly until my mother suggested that we fly over for the weekend to spend more time in Singapore.
We stayed over at my brother's place for a few nights. It was quite a relief as the accommodation in Singapore can be pretty expensive.
Didn't do much for the first day after touching down at Changi airport, just did some walking around and having dinner. The area around my brother's Condo where we are staying the night at, is pretty nice. There are nearby public transportations (MRT,bus,taxi stands), places to buy groceries and a lot of eateries.
For the 2nd day, we went over to Universal Studios in Sentosa Island. Spent the entire day there going for rides after rides. At one point, I was quite shaken after taking the Cyclone roller coaster. The twists and drops were unbelievably scary. Not to mention that I wasn't wearing my spectacles, so I couldn't really see (I have bad eye sight lol).
And thank God, I didn't bring my camera equipment, if not, I would be dead tired by the end of the day. In this sort of situations, it would be great to have a small, portable camera with you. Something like a mirrorless camera from Sony, example is the NEX F3 which goes for about RM2.3k only for a set with twin lenses! And it has a APS-C sensor!
Or an even more compact camera like the Sony RX100 which has a 1 inch sensor, though much smaller than the NEX F3. Comes with a bright 28mm f/2 lens and its size is only slightly larger than a Canon Powershot S110! Brilliant!
A little bit tempted to get such small form factor cameras to be honest for the convenience of course.
The last time I visited Singapore was actually just over 3-4 weeks ago, having to attend my brother's ROM over there. Never expected to go back so quickly until my mother suggested that we fly over for the weekend to spend more time in Singapore.
We stayed over at my brother's place for a few nights. It was quite a relief as the accommodation in Singapore can be pretty expensive.
Didn't do much for the first day after touching down at Changi airport, just did some walking around and having dinner. The area around my brother's Condo where we are staying the night at, is pretty nice. There are nearby public transportations (MRT,bus,taxi stands), places to buy groceries and a lot of eateries.
For the 2nd day, we went over to Universal Studios in Sentosa Island. Spent the entire day there going for rides after rides. At one point, I was quite shaken after taking the Cyclone roller coaster. The twists and drops were unbelievably scary. Not to mention that I wasn't wearing my spectacles, so I couldn't really see (I have bad eye sight lol).
And thank God, I didn't bring my camera equipment, if not, I would be dead tired by the end of the day. In this sort of situations, it would be great to have a small, portable camera with you. Something like a mirrorless camera from Sony, example is the NEX F3 which goes for about RM2.3k only for a set with twin lenses! And it has a APS-C sensor!
Photo credits to google lolz
Or an even more compact camera like the Sony RX100 which has a 1 inch sensor, though much smaller than the NEX F3. Comes with a bright 28mm f/2 lens and its size is only slightly larger than a Canon Powershot S110! Brilliant!
Photo credits to google lolz
A little bit tempted to get such small form factor cameras to be honest for the convenience of course.
Labels:
gardens by the bay,
Landscape,
marina bay sands,
nightscape,
Singapore
Tuesday, December 4, 2012
Joe and Carmen Actual Wedding Day
Had another opportunity to shoot an actual wedding day, this time it's Joe and Carmen's very special day. Thanks Daniel and Edwin for the opportunity to shoot alongside you guys and thanks Joe and Carmen for the chance to capture some pictures of your very special once in a lifetime day :)
p/s: The entire album was shot with a Canon 60D with a Tamron 17-50 f/2.8 non VC and a Canon 580EXII speedlite.
The usual thing for all actual wedding day shoots for photographers, getting up super early at around 5.30am, getting ready the gears, have a shower and off to the bride groom's place. Brought along my trusty Canon 60D, Tamron 17-50 f/2.8 non VC, Sigma 10-20 f/4-5.6 HSM and the Canon 580EXII speedlite. We were also a bit rushing so we didn't have any breakfast but we did manage to grab some food at the groom's place :P
p/s: The entire album was shot with a Canon 60D with a Tamron 17-50 f/2.8 non VC and a Canon 580EXII speedlite.
The usual thing for all actual wedding day shoots for photographers, getting up super early at around 5.30am, getting ready the gears, have a shower and off to the bride groom's place. Brought along my trusty Canon 60D, Tamron 17-50 f/2.8 non VC, Sigma 10-20 f/4-5.6 HSM and the Canon 580EXII speedlite. We were also a bit rushing so we didn't have any breakfast but we did manage to grab some food at the groom's place :P
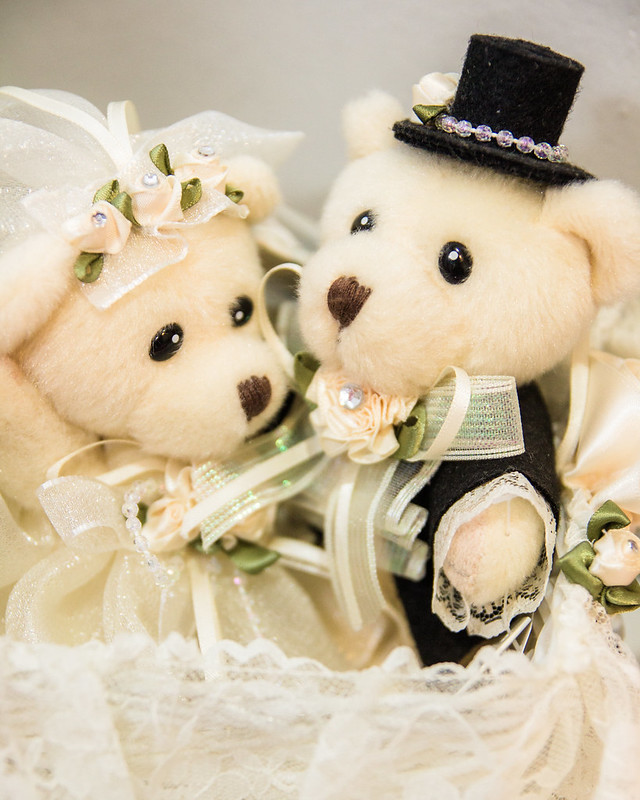
So when we reached the Joe's house, we didn't waste much time and started shooting away. Saw these cute soft toys and was intrigued by all the nice details on them. This shot was taken with flash, diffused and slightly bounced by the walls around the soft toys, which in return creates a soft light on the subject.
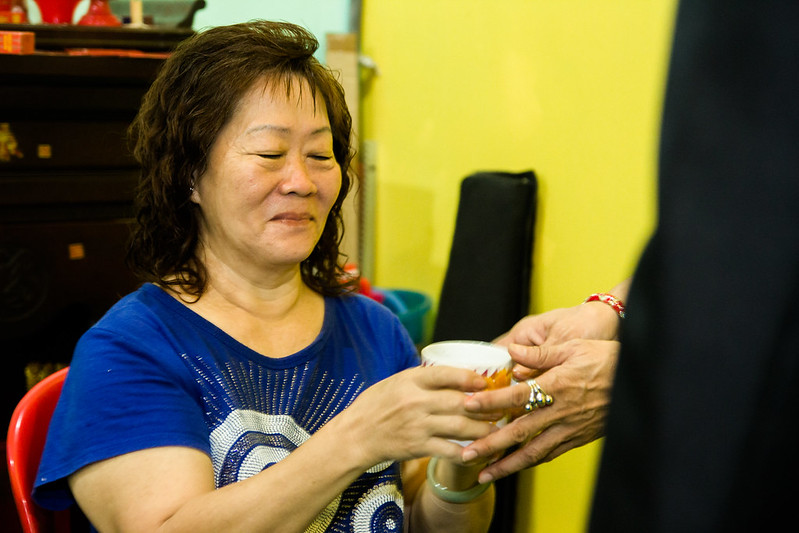
After Joe changed into his suit, then there was the tea ceremony. The mum looked pretty energetic in the morning but did seem a little emotional when being served tea by her son. Understandable yeah :D
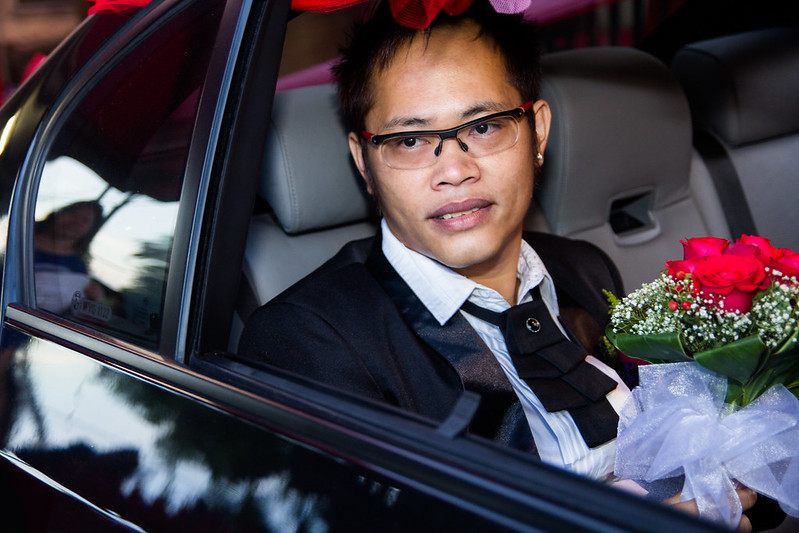
Joe was all prepared in the car to depart to the bride's house. Managed to capture this shot of him when he was looking back at his mum (reflection on the left) just before the car was about to leave. His expression was like he was telling his mum... "Wish me luck!".
It was long journey, close to 2 hours from Cheras to Melaka, to Carmen's house. But it was well worth it when we were greeted by ever cheerful and smiling bridesmaids. I wonder why? Perhaps they're giggling as to what the best men are to face in the gate crashing activities! :D
Wednesday, November 21, 2012
Voon Keat and Eli's Actual Wedding Day
I had the upmost pleasure to have the opportunity to capture Voon Keat and Eli's special day with their friends and family. Shot alongside my friend Edwin Ng and thanks for the shoot!
p/s: Wall of pictures lol :P
Subscribe to:
Posts (Atom)